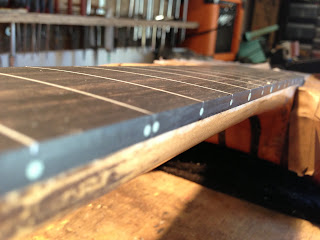
This bass had two major issues, a broken truss rod and a two-piece fingerboard that was separating at the seam.
On the bench for inspection.
The truss rod had failed, and was pulling itself out of the neck when adjusted.
Removing the fingerboard.
New truss rod channel routed. Maple pieces added as bass side ebony piece did not reach the fingerboard.
Headstock end checked for adjustment nut clearance.
Maple filler piece glued to accomodate new truss rod.
New ebony fingerboard slotted and located with maple dowels.
New fingerboard after glue-up.
End of fingerboard trimmed for new nut.
Dowel holes countersunk and ebony filler glued in place.
Fret position inlay markers glued in place.
Trimming back filler material.
Fret markers levelled.
Fret markers levelled and ready for radius sanding.
Beginning radius sanding.
Radius sanding finished.
Inlay marker material trimmed to edge.
New side dot marker holes drilled. Neck is temporarily coated in wax to protect it from adhesives.
Inlay marker material glued in place. This special marker material is made by Luminlay, and glows in the dark when charged by a UV light.
Marker material trimmed back.
Fingerboard edge sanded flush and edges rounded.
Fingerboard buffed and oiled.
Luminlay markers after UV charging.
Bass completed.
This instrument presented several challenges, but the end result was a stable, fully adjustable neck with great tone.


No comments:
Post a Comment